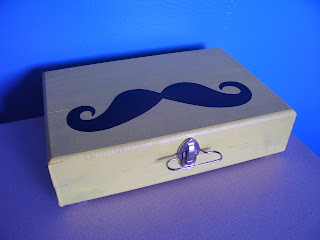
Today I am using one of the panels Scott and I made to paint on. You are free to stick a stache on anything you like but Scott's whole tutorial on how we made these panels can here found here - how-to-build-cheap-panel-for-painting
I will get back later to why I chose to glue a piece of fabric half covering the opening in the back but I did paint all four sides and the back black. For this I use every day cheap bottled plaid acrylic paints that can be found at wal mart or any craft store, nothing fancy.
Then flipped it over and chose a nice bright red for the front since most of my house is done in primary colors.
Now if you scroll down I made a set of staches to trace and paint at the bottom of the page. Currently they are saved at about 3 inches in size. I needed mine to be about four inches so I right click saved the image, opened it in paint, hit print preview then selected to make it larger then hit print. On the yellow one shown at the top of the page, for that I just reoriented the page print out to landscape then hit fit to page to get a nice large full page size stache for that one.
cut it out, align it where you want on your piece
Now if I was doing this myself I would just straight paint it on there no stencil because I can but for you guys I am going to suggest just lightly tracing around it with a pencil.
So it then looks like this
I then paint it in but you can see that my pencil line was a little unclean and I chose to not exactly follow it. Now habit would say go get an eraser. And you can BUT make sure your paint is fully dry so you do not smear it.
I do not erase, I chose to take the background red and just re outline the outside of my stache with it
Tada, dry and looking good on top of my fridge
Now for fun, since I am a dork like that I flipped this bad boy over and wrote sekret stache in it, drew an additional mini stache back there.
And it is just large enough to hide a few small things
And that would be it
here are the stache outlines I created for you, you do not have to use these, go find/create your own if you so desire.
click the stache to enlarge, right click save as to print.
remember if you have printing issues to go back up to see how I talked about resizing them before printing to make sure they will properly fit your object
now go stache some stuff


No comments:
Post a Comment