Sunday, September 30, 2012
What is a Tank-O-Lantern?
The name we came up with for the collaborative project between Scott and I upcycling used refrigerant tanks into non rotting Halloween pumpkins of sorts.
We happen to have a source for empty refrigerations tanks. Rather than see them end up in a landfill, we've come up with a great way to upcycle them. You need to be very safe when handling such tanks. Cutting into a pressurized tank could be very dangerous. We always make sure to be safe and open up the valves. I also wear a substantial respirator what filters our particulates as well as any organic vapors. The smell of freon being burned is like mustard gas. Be safe when cutting anything, but especially tanks.
full details on how I go about designing tanks can be found here...
Full details on how Scott cuts my designs can be found here...
When he is finished I take them out to the yard and give them a good rinse off and allow them to dry before I bring them inside, install lights and photograph them.
We do also sell them, for the list of what is currently available you can check our store.
Tuesday, September 25, 2012
Wenchkin's Coloring Pages - Dia de los Lily Munster
Because I posted Herman earlier and I can not post Herman without Lily
you can find his coloring page here.
Click the picture to enlarge, right click save as to print and color.
you can find his coloring page here.
Click the picture to enlarge, right click save as to print and color.
Wenchkin's Coloring Pages - Dia de los Herman Munster
Yeah I know it is not quite October or Halloween yet but I can not wait any longer.
Click the picture to enlarge, right click save as to print and color
Tuesday, September 18, 2012
Making your own note card sized envelopes.
Since I started my mail art project I chose to not do post cards but note cards in envelopes instead. This means I need a LOT of envelopes. I also have had a few people send me things in envelopes that appeared they made so I sat down, ripped one apart and figured out what it takes to make my own.
Click the picture to enlarge it, right click-save as with your mouse to save it and print.
Then take your template , cut it out and get to tracing it on whatever paper you have chosen.
Then cut them out. I intentionally did not straighten the wrapping paper, know if you choose to use paper that came off of a roll that it will naturally try to roll up on you. I watched a documentary called Between the Folds I mention only because it taught me that paper has a memory. It remembers anything you do it it. Be sure your fold is where you want it as once you wrinkle or fold something you will never fully be able to get the fold back out of it. Paper will always remember.
So let's get to folding.
I cataloged that journey for those of you that might like to try this and I like to blog on occasion so it is a win - win. I made myself a template that I scanned for you all to use.
So let's walk through what I used and how to do it.
Scissors, Glue stick, Envelope Template, Extra paper. For this I pulled out a few things just to show you that you really are only limited to whatever size paper your template will fit*. So I grabbed some colored copy paper, a magazine and two kinds of wrapping paper.
*I chose this size since it easily fits on an 8.5 x 11 normal sheet of paper.
Also note you should trace your stencil on to the BACK of your paper
just to better hide your pencils lines later.
Then cut them out. I intentionally did not straighten the wrapping paper, know if you choose to use paper that came off of a roll that it will naturally try to roll up on you. I watched a documentary called Between the Folds I mention only because it taught me that paper has a memory. It remembers anything you do it it. Be sure your fold is where you want it as once you wrinkle or fold something you will never fully be able to get the fold back out of it. Paper will always remember.
So let's get to folding.
I stack up a few pieces of paper and lay them along the fold line. Or from corner notch to corner notch. This will help you make a straight fold. Bend the flap over the pieces of paper and use your finger tips to smooth over the edge making a good crease in the paper.
Do this on the bottom and sides. This is always the bottom tab shown above, the one that does NOT come to a point at the end. The top you want to raise your fold line just a little bit higher than corner to corner just to give it room to fold over the other parts in the end. When I so this I do an assembly line of sorts and cut out a bunch, fold a bunch, glue a bunch. I did four just for this so this is what I currently have.
Now we get to gluing. I always do this on a junk piece of paper not not get glue on other things. Fold the bottom (the one with no point) in to the center.
Now we are going to glue the sides, only the bottom part of the and only 1/4 on and inch in from the edge. See how much my glue stick hangs off the edge? This is what I want and why I have junk paper under this thing. I am going to give it one good pull along the edge and only go back over it if it appears I did not get enough glue but you do not need much.
Only do the bottoms of the sides, stop here.
Fold the sides in one at a time and smooth the glued part down with your finger
This was obviously some page I ripped out of a magazine just to prove you could use just about anything. The other side.
As far as not having lick-able gum to seal em, I say who needs it, I often either tape or glue stick mine shut because potato.
Tuesday, September 11, 2012
Wenchkin's Coloring Pages - Dia de los Octoberfest
When I posed the question this week as to what people wanted to see for the big kids coloring page I got two answers, boobs and Octoberfest. Normally I would venture to say skeletons to not have breasts but I did my best to leave her outline normal and just map bones to it. So Ross and Jesus, this is the best I can do you for.
click the picture to enlarge, right click save as to print and color.
Saturday, September 8, 2012
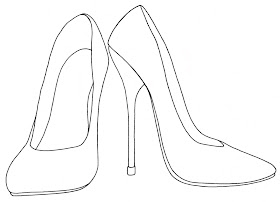
Wenchkin's Coloring Pages - Day of the Heels plus bonus page
If I had these to redo, (which I do) I might do them differently
Then I thought maybe you wanted to design your own pair as well
so here is the blank pair for you to do whatever you like with
Thursday, September 6, 2012
Tuesday, September 4, 2012
Month in Review - August
With that said we are coming on probably at least two weeks of no new tanks so Scott kicked it into gear and cut out and listed a new set before getting ready to leave. Instead of uploading 14 pictures of the 7 new tanks I made a little gif.
Those as well as the rest of the tanks we currently have available can be found here...
I followed him around just shooting pictures.
Since sometimes it is fun for me to color something that is not my own.
Speaking of that, here are the coloring pages that have recently been added.
Knit-Perl
Dia de los Heisenberg
Dia de los Dexter
Dia de los Maneki Neko
Dia de los Adam West
The Burning of Zozobra which is a yearly event that happens here two days from today.
and Pabst has decided that cardboard boxes are all the rage this fall.
I think that just about covers the good stuff you might have missed.
Wenchkin's Coloring Pages - The Burning of Zozobra
Click the pic to enlarge, right click save as to print and color.